Creating the Virtual World - How to Make an Interior 3d Render?
Written by Cleanpix Graphics
'3d rendering' is the common term given to a process of generating a virtual still image or animated sequence of images with the use of powerful computer hardware and specialised software.
One of the most prevalent areas where the use of 3d rendered imagery has taken a firm foothold, has been in real estate advertising and architectural concept design. The use of artist impressions for sales and marketing of property has become an absolutely indispensible and essential tool.
Industry leader Cleanpix Graphics - a 3d visualization studio located in Melbourne, Australia - explains the general steps that need to be undertaken to create an interior 3d rendering of a contemporary open-plan kitchen design.
While some people are under the illusion that the computer does all the work and the 3d artist has to merely press a few buttons, this is far from the truth.
- Creating a 3d model of the internal space
- Applying colours and textures to the 3d model
- Scene population (Adding 3d models of plants, entourage, furniture, accessories etc.)
- Lighting and camera setup
- Scene rendering
- Output retouching and post-production
The initial 3d modelling stage entails the conversion of the architect's 2d technical floor plans, elevations and cross section drawings into 3 dimensional wireframe objects. This is usually achieved by tracing the supplied flat drawings and assigning height and/or depth.

Above: Wireframe model of internal space created in 3d space.
Once the 3d model has been constructed in virtual space, colours and textures can be applied to the geometry as per the architect's and interior designer's specifications. Textures like brick, concrete, timber and marble are often created by using a real life photo of these materials and applying them to the model like gift wrap around a package. Materials can also have various assigned properties like reflectivity and transparency values in order to create a more realistic representation.
After the 3d model of the proposed building and site works is completed and textured, the artists will populate the virtual space with additional 3d models of plants, furniture, fixtures & fittings and other decorative accessories. The majority of these models will come from the 3d visualiser's stock library collections that would be accumulated over time by purchasing from specialty online retailers. In some cases, clients will request specific pieces of furniture, planting or styling accessories to be included and these 3d models will need to be created from scratch or purchased online.

Above: Colours and textures are applied to the 3d model geometry. Model space is populated with furniture, fittings and accessories.
As the 3d scene is completed, it is time to set up lighting simulation and image composition by creating light emitters and camera objects within the model space. The camera will be poitioned at the desired angle with specific exposure and white balance settings selected (similar to using a DSLR camera in real life).
This is a very important stage as it comes to define the look and feel of the final image. The lighting can be set up to simulate, dawn, midday, dusk or night time, permitting the artist to create a desired mood and visual style.
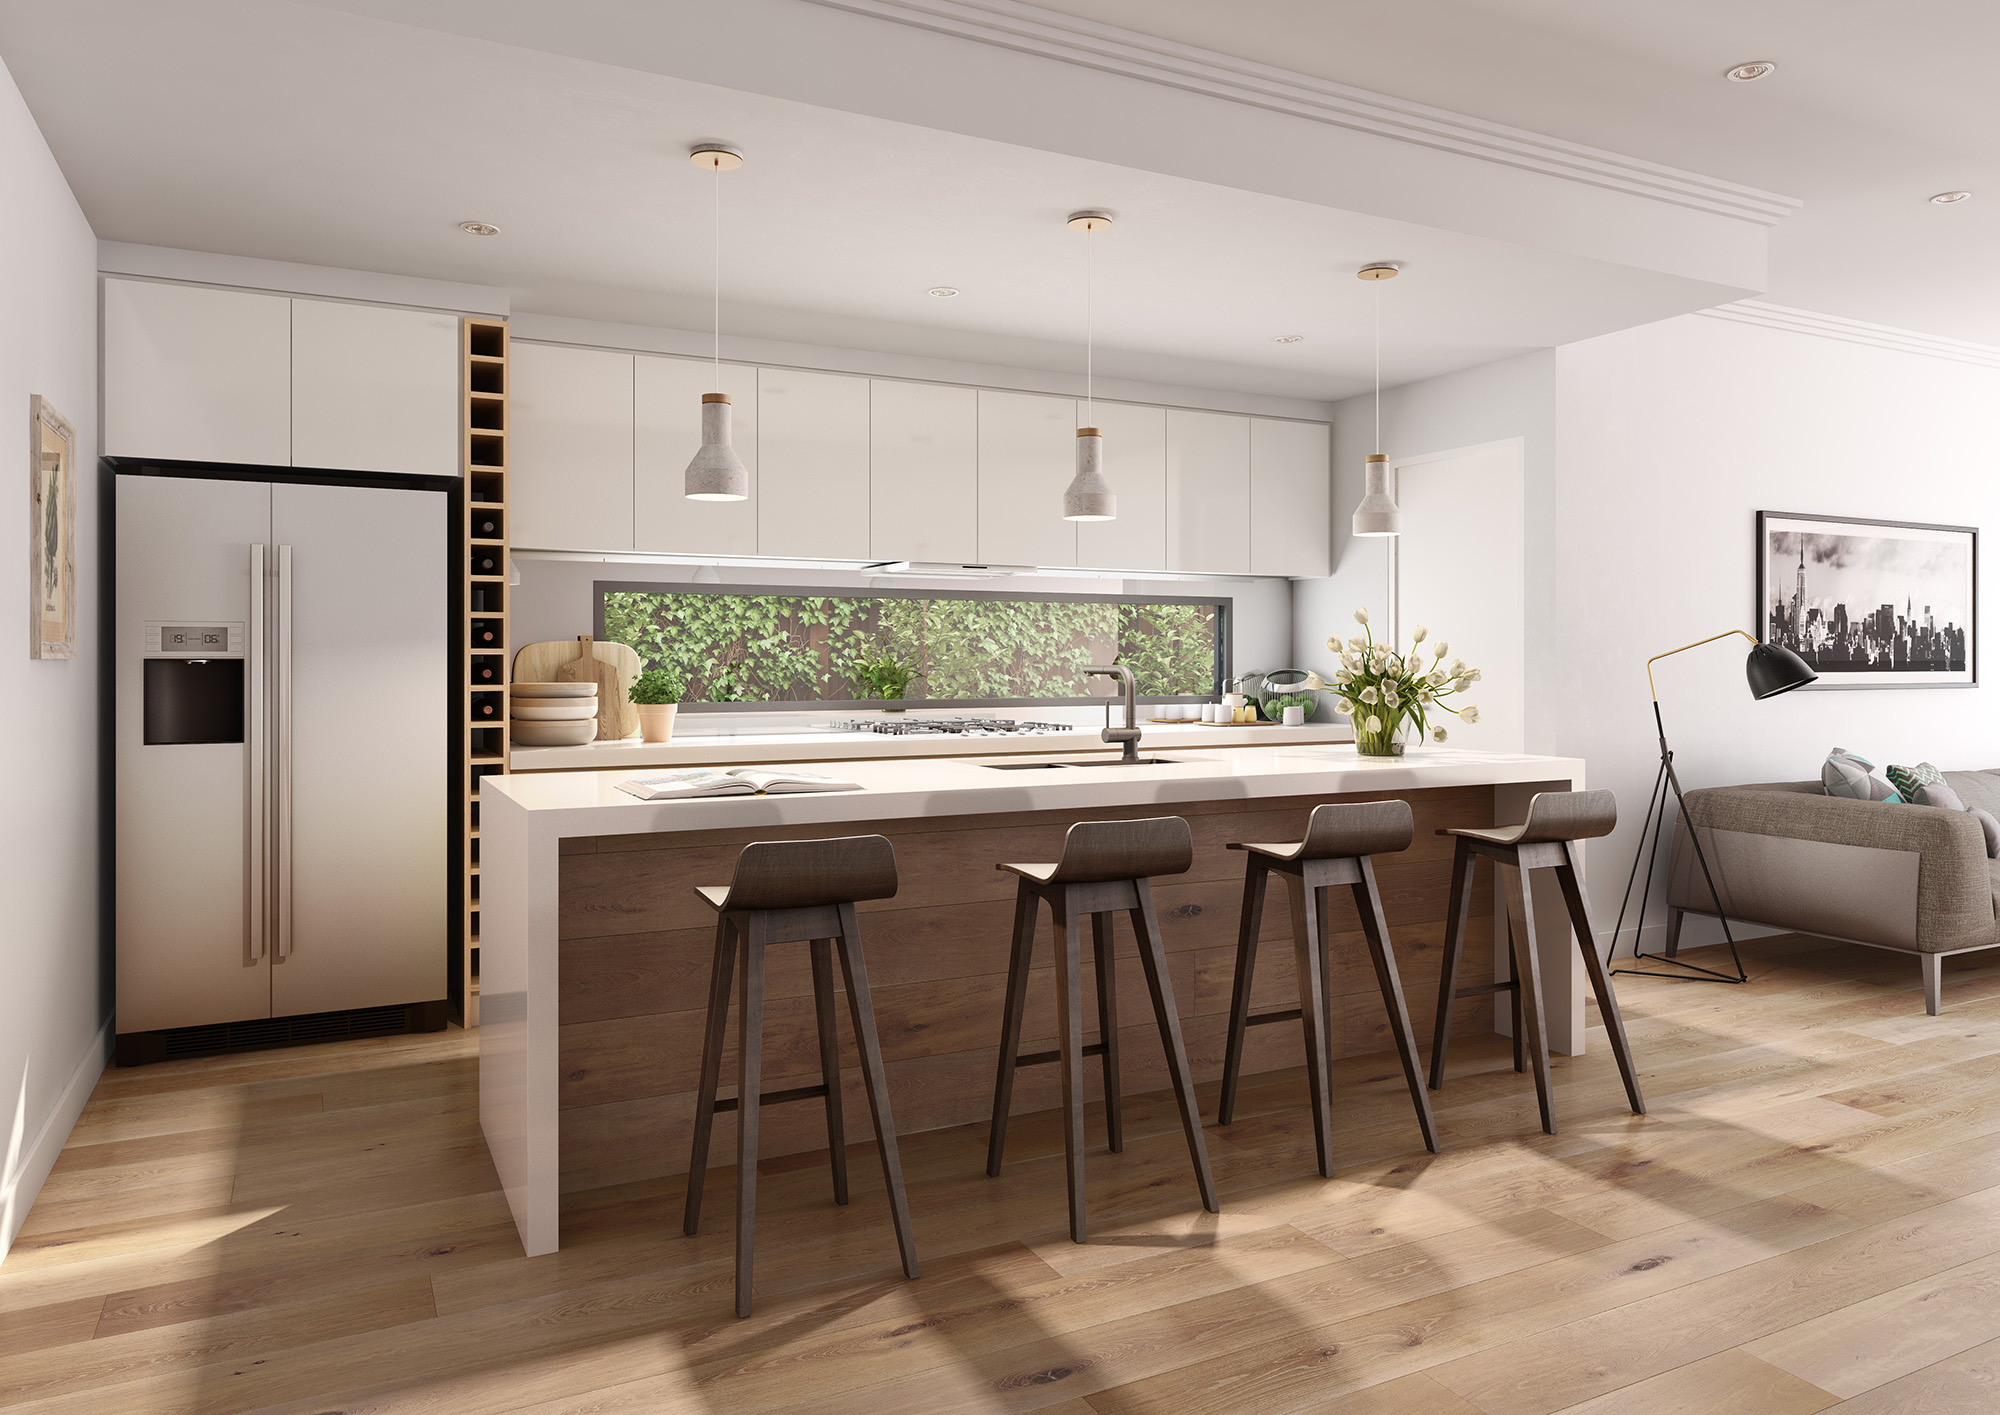
The final steps in the process involve the actual '3d rendering' whereby the computer software will generate a photo quality image of the textured 3d model with lighting calculations and various realistic material properties. This is where we start to see shadows, artificial and natural lighting, reflections and transparencies incorporated in the image, resulting in a much more photorealistic output.
Once the render output has been calculated (a process that can take several hours for a high resolution version) and saved out in an image format, the final step is post-production and retouching. This is usually undertaken in Adobe Photoshop for still image artwork. Colour levels are adjusted, dark spots are brightened, contrast and sharpness added, reflections are boosted, resulting in the finished version of the 3d artwork.

Above: A rendered output is created with lighting simulation, shadows, reflections and transparency (top left). The output image is retouched in photoshop, resulting in the finished product (top right).
Most 3d rendering studios will include a budget for at least 2 or 3 rounds of progress submissions to the client, to allow them to provide feedback and make requests for changes and design direction. Frequently it is not uncommon to go through 4 or 5 rounds of revisions before the clients are fully satisfied and give approval to finalise. For additional details, we have prepared a guide on ensuring a smooth 3d renders revision process.
Once the client is happy with all the modelling and rendering changes, a final version of the artwork is output at a high resolution with higher render quality settings, normally 5K-6K size (or approximately 20-25 megapixels). The final artwork files are then delivered digitally to the client.
With the passage of time, 3d rendering technology has developed in leaps and bounds and today it is possible for any professional visualisation studio to create stunning imagery that is indistinguishable from real life photography.


Cleanpix Graphics | Services | Prices | FAQ | Downloads | Blog | Contact | Interior 3d Renders | Exterior 3d Renders | 3d Floorplan Renders